A digestive biscuit recipe combines wholemeal flour, oats, butter, sugar, and baking soda, baked until golden and crisp.
Most people who go searching for a digestive biscuit recipe are chasing one specific memory: that crumbly, slightly nutty bite that tastes like it belongs with a cup of strong tea. Maybe you grew up dunking McVitie’s into your mug. Maybe you ran out at the worst possible moment for a cheesecake base and figured, how hard can it be to make my own?
Pretty easy, as it turns out, once you understand what’s actually happening in the dough. But there’s a second story here too, one that most recipe blogs skip entirely. The same biscuit that takes 25 minutes in your kitchen gets produced by the millions every single day on automated lines that mix, sheet, cut, dock, bake, and pack a digestive biscuit roughly every second. Understanding both ends, the home version and the factory version, actually makes you better at the home version, because you start to see why each step in the recipe exists.
This guide walks through both. We’ll cover what a digestive biscuit actually is, the main variants you’ll encounter, a tested step-by-step home recipe, the mistakes that ruin most batches, and where commercial digestive biscuit recipe formulations are headed in 2026.
What Is a Digestive Biscuit?
A digestive biscuit is a semi-sweet, wholemeal wheat biscuit, mildly sweetened, leavened with baking soda, and baked to a sandy, crumbly texture. It’s British in origin and built for dunking.
The name causes more confusion than it should. Digestive biscuits were first developed in the 1830s by Scottish doctors Alexander Grant and his colleagues, who added sodium bicarbonate to the dough as an antacid. At the time, baking soda was believed to aid digestion, hence the name. According to Wikipedia’s entry on the digestive biscuit, the modern version was popularized commercially by McVitie’s starting in 1892, and the name stuck even though nobody today is eating one for medicinal reasons.
Origin and the “Digestive” Name
Here’s the part most people get wrong: there’s nothing special about the digestive properties of a modern digestive biscuit. The bicarbonate of soda does react with the acidic buttermilk or sour components in some traditional formulas, producing a mild leavening effect, but that’s true of plenty of baked goods. The name is a 19th-century marketing artifact that never went away, much like how “graham crackers” are named after a 19th-century dietary reformer rather than any health claim that holds up today.
What does matter for flavor and texture is the wholemeal flour. Standard digestive biscuit recipe formulations use a blend of wholemeal (whole wheat) flour and white flour, usually somewhere between 30% and 60% wholemeal, which gives the biscuit its characteristic light-brown color, slightly grainy texture, and faintly nutty taste.
Nutritional Profile and Ingredients
A typical digestive biscuit recipe contains six core ingredients: wholemeal flour, white flour, rolled oats (optional but common), unsalted butter, sugar (usually a mix of granulated and brown), and baking soda, plus a pinch of salt and a small amount of milk to bind the dough.
Nutritionally, digestives sit in an interesting middle ground, not a health food, but not as sugar-heavy as a cookie either. A standard McVitie’s digestive runs around 70-73 calories per biscuit, with roughly 9.5g carbohydrate, 3g fat, and 1g fiber. The wholemeal content means digestives contribute more fiber than a plain white-flour biscuit, which according to Harvard’s Nutrition Source on whole grains is one of the reasons whole-grain products are associated with better long-term metabolic health markers compared to refined-grain equivalents.
Here’s how a standard digestive biscuit compares to its closest tea-time relatives:
| Biscuit type | Main flour | Sweetness level | Texture | Typical use |
|---|---|---|---|---|
| Digestive biscuit | Wholemeal + white blend | Mild | Crumbly, sandy | Tea-dunking, cheesecake base |
| Graham cracker | Graham (whole wheat) flour | Mild-moderate | Crisp, slightly snappy | S’mores, pie crusts |
| Rich tea biscuit | White flour | Very mild | Light, dry | Tea-dunking |
| Shortbread | White flour, high butter ratio | Moderate | Dense, crumbly | Standalone snack |
If you’ve made graham crackers before, a digestive biscuit recipe will feel familiar. They’re cousins, separated mostly by the ratio of wholemeal flour and the inclusion of oats.
Types of Digestive Biscuits
There are three main categories of digestive biscuits worth knowing before you pick a recipe: plain wholemeal, chocolate-coated, and the newer health-oriented reformulations.
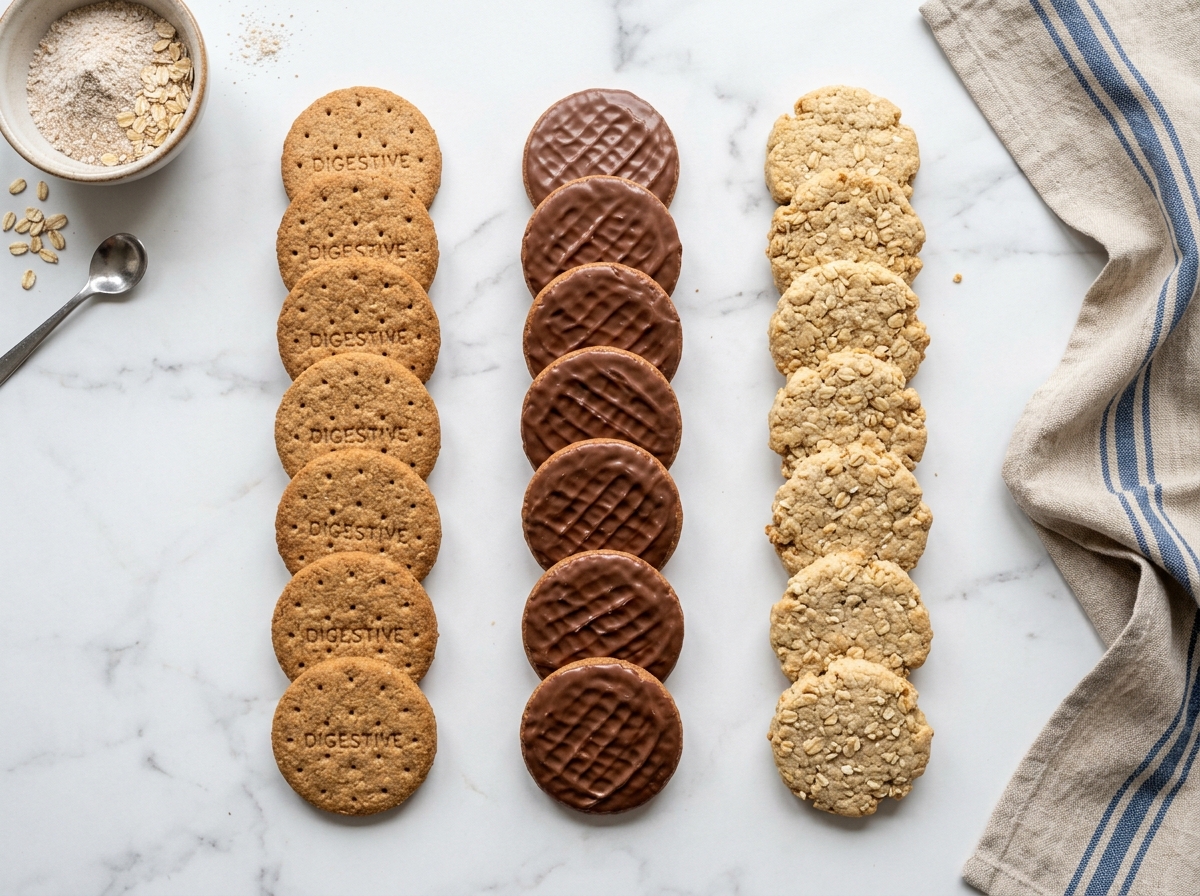
Plain Wholemeal Digestives
This is the original and still the most common base for any digestive biscuit recipe. Plain digestives use the wholemeal-and-white flour blend described above, with butter providing richness and a touch of brown sugar adding a faint caramel note. They’re the version used as a cheesecake or pie crust base because their flavor is robust enough to stand up to cream cheese and fruit fillings without getting lost.
Chocolate-Coated Digestives
Chocolate digestives, milk chocolate on one side, plain biscuit on the other, are a UK supermarket staple and arguably more popular than the plain version at this point. For a homemade digestive biscuit recipe, this is simply an extra step: bake and cool the plain biscuits, then dip or spread one face with melted chocolate and let it set on a wire rack. The trick most home bakers miss is tempering the chocolate, even roughly. Untempered chocolate sets with a dull, streaky finish and won’t have that satisfying snap.
Gluten-Free and Reduced-Sugar Variants
This is where digestive biscuit recipe development has moved fastest over the last few years. Gluten-free versions typically swap the wheat flour blend for a mix of oat flour (certified gluten-free), rice flour, and a binder like xanthan gum to compensate for the lost gluten structure. Reduced-sugar versions cut the sugar by 20-30% and often add a small amount of inulin or a sugar alcohol to maintain browning and texture, since sugar isn’t just for sweetness, it also affects moisture retention and the Maillard browning reaction.
According to an extension publication from the University of Illinois on reducing added sugars in baking, cutting sugar by more than about 25% in a standard formula without an alternative bulking agent tends to produce a drier, harder final product, which lines up with what we’ve seen in test batches of low-sugar digestive biscuit recipes that skip a substitute entirely.
| Variant | Flour base | Sugar level | Special ingredient | Shelf life (sealed) |
|---|---|---|---|---|
| Plain wholemeal | Wholemeal + white blend | Standard | Rolled oats (optional) | 4-6 weeks |
| Chocolate-coated | Wholemeal + white blend | Standard + chocolate | Tempered chocolate coating | 4-6 weeks |
| Gluten-free | Oat flour + rice flour | Standard | Xanthan gum binder | 3-4 weeks |
| Reduced-sugar | Wholemeal + white blend | -20% to -30% | Inulin or sugar alcohol | 3-5 weeks |
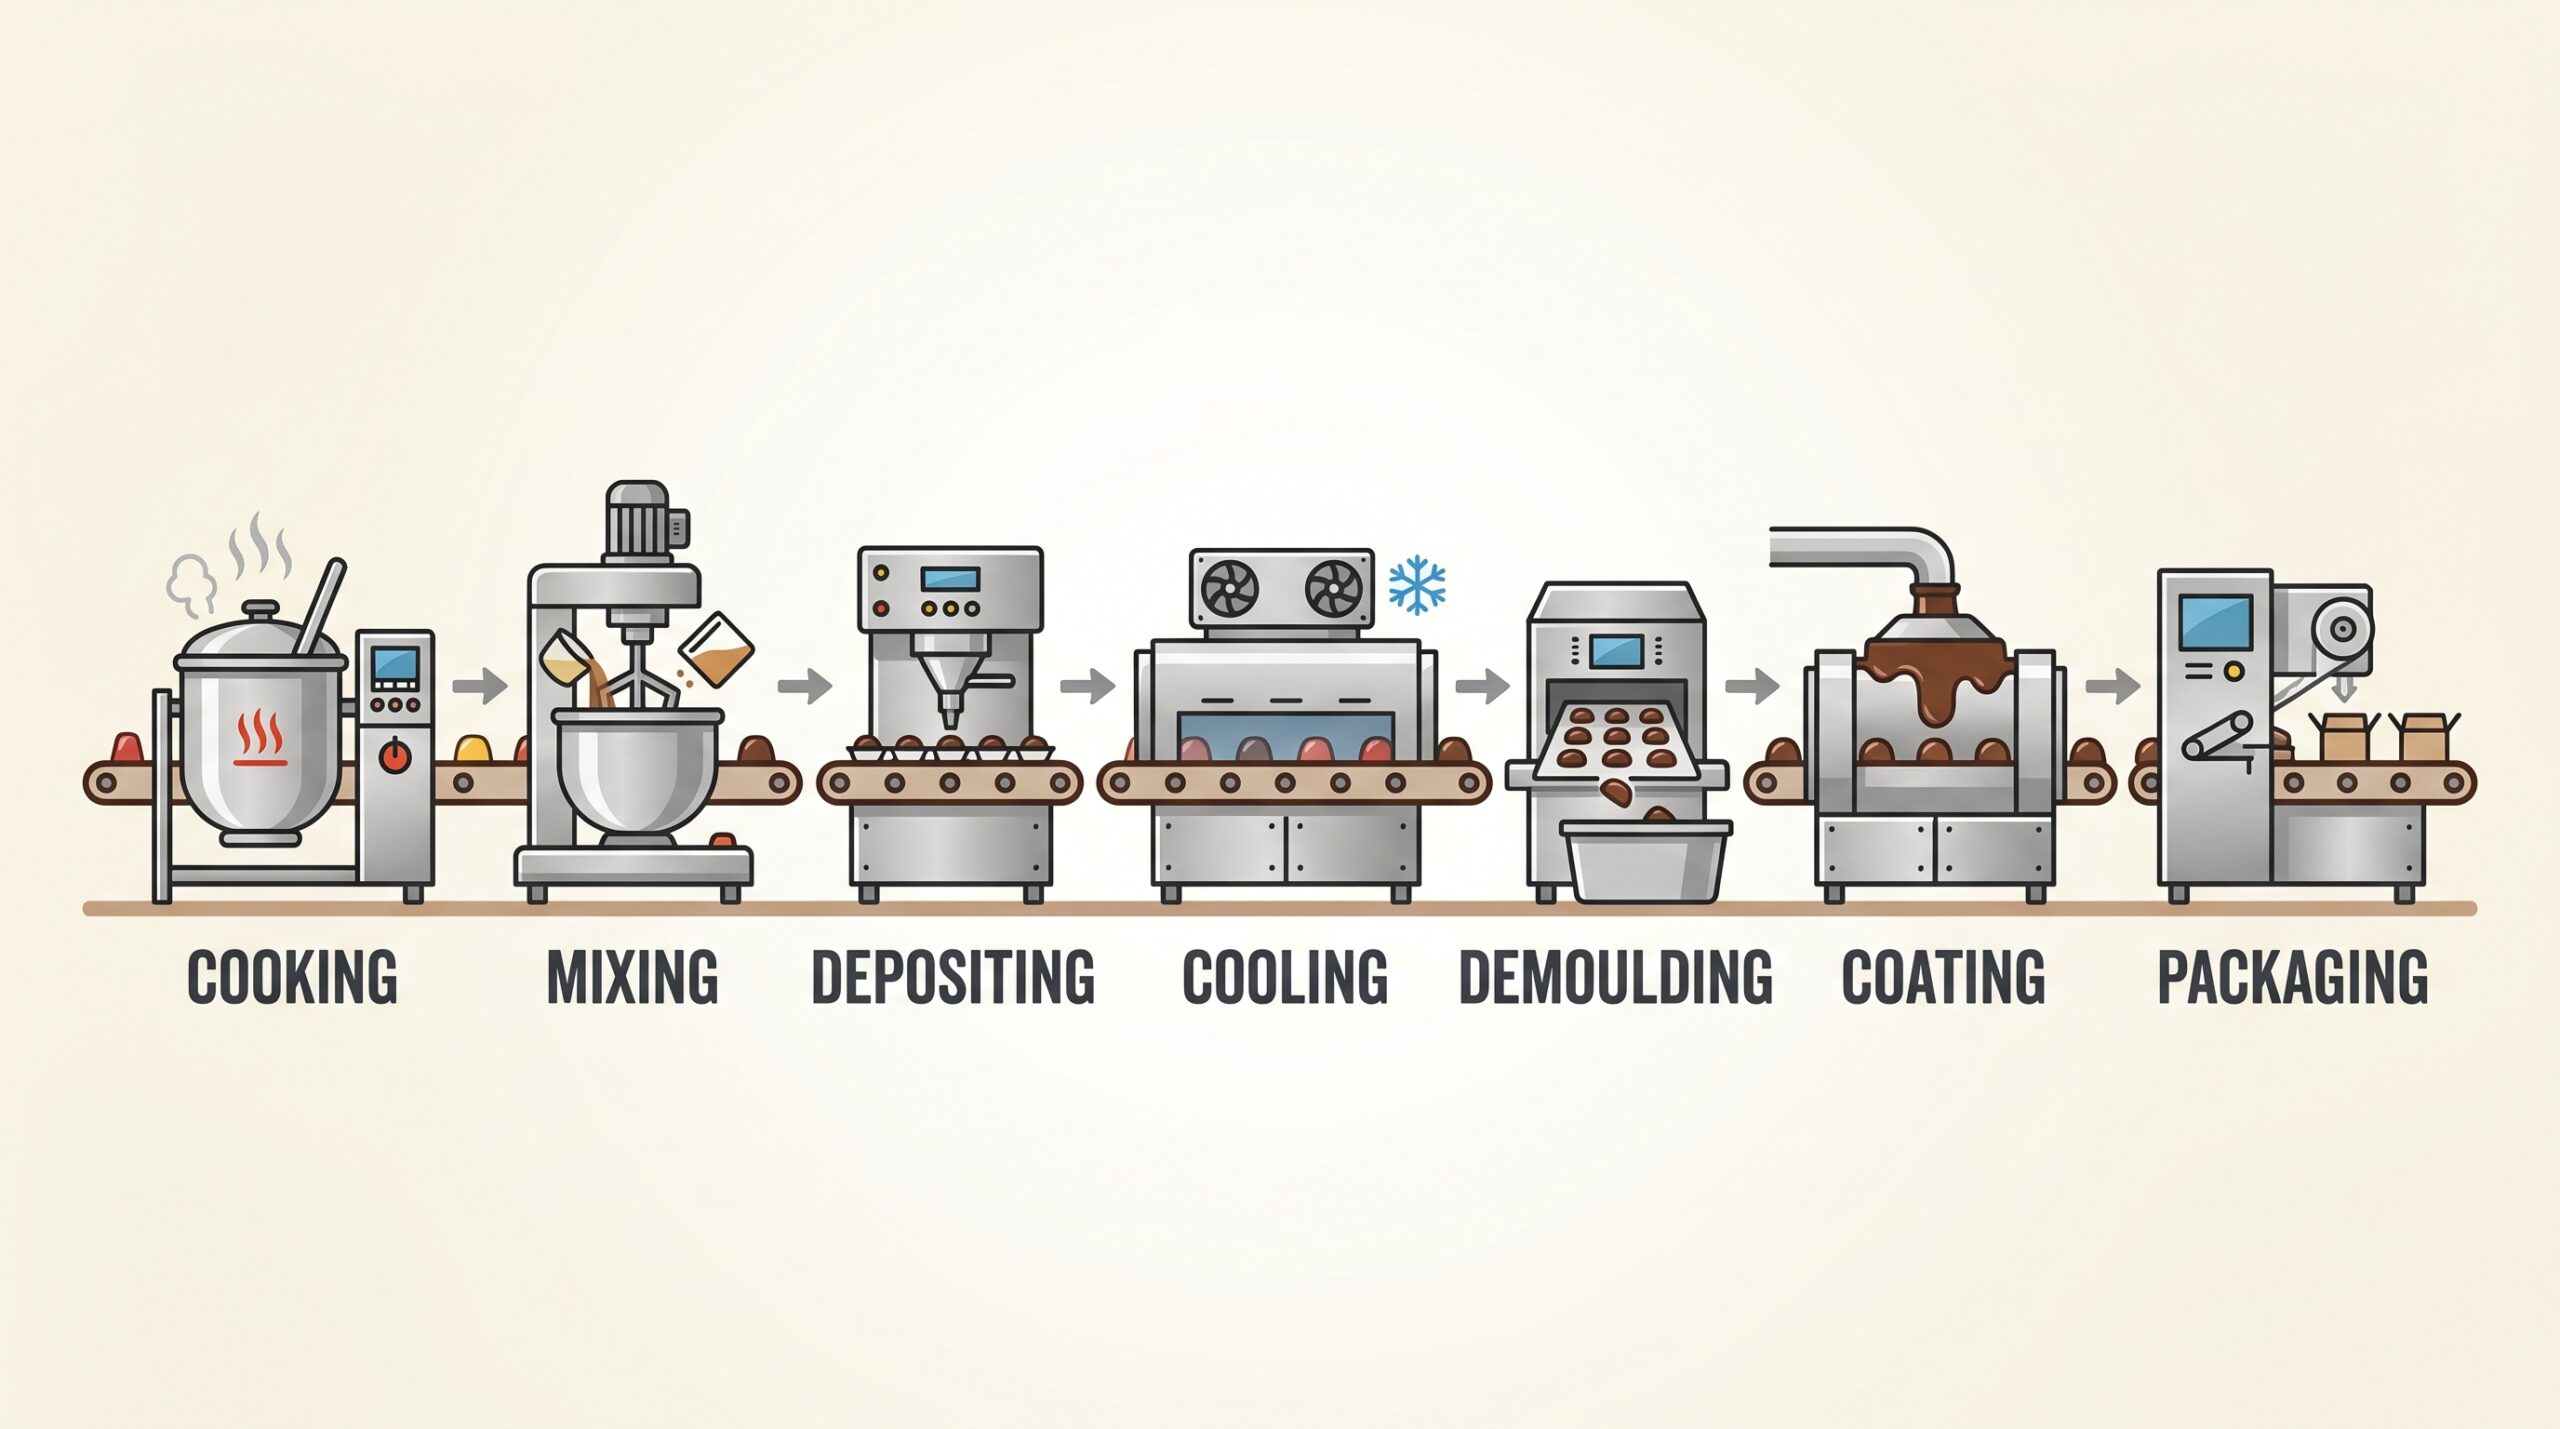
From Kitchen to Factory: How Digestive Biscuits Are Made
The home process and the industrial process follow the same five stages (mix, shape, bake, cool, finish), but the scale changes everything about how each stage is engineered.
Home Baking Process
At home, a digestive biscuit recipe goes through a simple sequence: cream the butter and sugar, work in the dry ingredients to form a firm dough, roll it out, cut rounds, dock (prick) the surface so steam escapes evenly, bake until the edges turn golden, and cool on a rack until they firm up. The whole batch, start to finished biscuit, takes about 45 minutes including cooling, and yields roughly 20-24 biscuits from a standard recipe.
Industrial Production Line
Scale that recipe up to a few thousand kilograms per hour, and the process becomes a continuous line rather than a batch. We’ve spent time around commercial biscuit production lines, and the sequence maps directly onto the home steps, just automated and continuous:
- Mixing: Industrial mixers blend flour, fat, sugar, and water in large batches, often using a creaming or all-in-one method depending on the dough’s fat content. Hard-dough biscuits like digestives use lower fat-to-flour ratios than soft cookie doughs, which affects mixing time and dough resting requirements.
- Sheeting and laminating: The dough passes through a series of rollers that gradually reduce its thickness while developing a layered structure, which is part of what gives a digestive its characteristic flaky-crumbly bite rather than a dense one.
- Rotary moulding or cutting: A rotary moulder presses the dough into individual biscuit shapes (including the dock holes) in one continuous motion. It’s the industrial equivalent of cutting rounds and pricking them with a fork.
- Tunnel baking: Biscuits travel through a multi-zone oven on a wire mesh band, with each zone set to a different temperature to control browning, moisture loss, and structure-setting in sequence.
- Cooling: A cooling conveyor brings the biscuits down to room temperature gradually; cooling too fast can cause cracking, and too slow leaves them soft going into packaging.
- Enrobing (for chocolate digestives): Biscuits pass under a curtain of tempered chocolate, then through a cooling tunnel that sets the coating with the right gloss and snap.
- Packaging: Automated wrapping and cartoning lines handle the final stage, often with metal detection and weight-checking built in.
If you’re researching equipment for this kind of setup, our biscuit production line page covers configurations suited to both soft-dough and hard-dough biscuits like digestives, and our breakdown of how factories make millions of cookies daily goes deeper into the line layout and throughput math.
Quality Control and Shelf Life
On a production line, quality control checkpoints sit at almost every stage: moisture sensors after baking, weight checks before packaging, and visual inspection for color consistency, since uneven browning is usually the first sign that an oven zone is running hot or cold. At home, your “quality control” is really just your eyes and your oven thermometer, but the principle is identical: moisture content at the end of baking determines both texture and shelf life. A digestive biscuit recipe baked to the right internal moisture (roughly 2-4%) will stay crisp in an airtight container for two to three weeks; underbaked biscuits go soft and stale within days.
Step-by-Step Digestive Biscuit Recipe at Home (Plus Common Mistakes)
Here’s a tested digestive biscuit recipe that produces about 20 biscuits, with the mistakes that most commonly derail a first attempt.

Ingredients and Equipment
You’ll need:
- 1 cup (120g) wholemeal (whole wheat) flour
- 1/2 cup (60g) all-purpose flour
- 1/2 cup (45g) rolled oats, blended into a coarse flour
- 1/2 teaspoon baking soda
- 1/4 teaspoon salt
- 1/2 cup (115g) cold unsalted butter, cubed
- 3 tablespoons granulated sugar
- 2 tablespoons brown sugar
- 3-4 tablespoons cold milk
Equipment: a mixing bowl (or food processor), a rolling pin, a round cutter (about 7cm), a fork for docking, and a baking sheet lined with parchment.
Method
- Combine dry ingredients. Whisk together the wholemeal flour, all-purpose flour, blended oats, baking soda, and salt.
- Cut in the butter. Rub the cold butter into the flour mixture with your fingertips (or pulse in a food processor) until it resembles coarse breadcrumbs. This step matters more than people think: keeping the butter cold prevents the dough from spreading too much during baking.
- Add sugar, then milk. Stir in both sugars, then add milk one tablespoon at a time, mixing just until the dough comes together into a firm, slightly dry ball. Don’t overwork it.
- Rest the dough. Wrap in plastic and chill for 20-30 minutes. This relaxes the gluten and firms the butter back up, which keeps the biscuits from spreading during baking.
- Roll and cut. Roll the dough to about 4-5mm thickness on a lightly floured surface. Cut rounds with your cutter and transfer to the lined baking sheet.
- Dock the surface. Prick each biscuit several times with a fork. This lets steam escape and prevents puffing or cracking.
- Bake. Preheat the oven to 180°C (350°F) and bake for 12-15 minutes, until the edges are golden brown and the centers look just set.
- Cool completely. Transfer to a wire rack. The biscuits firm up significantly as they cool. They’ll seem soft straight out of the oven, and that’s normal.
Tip from experience: If your dough feels sticky after step 3, you’ve likely added too much milk or your butter was too warm. Add a tablespoon of flour and chill the dough for an extra 10 minutes rather than trying to fix it by rolling it thinner. Thin dough bakes too fast and burns at the edges before the center sets.
Common Mistakes and Fixes
- Biscuits spread too much and lose their shape: usually means the butter was too warm or the dough wasn’t chilled long enough. Chill the cut rounds on the tray for 10 minutes before baking if your kitchen is warm.
- Biscuits are pale and soft even after the time is up: your oven may be running cool. Digestives need enough heat to properly brown the wholemeal flour’s natural sugars; an oven thermometer is worth the small investment.
- Texture is gritty rather than sandy: this happens when the oats aren’t ground finely enough. Pulse them in a food processor or blender until they resemble coarse sand, not whole flakes.
- Biscuits taste flat: a pinch more salt than you think you need usually fixes this. Salt is what makes the wholemeal flavor pop rather than just tasting “brown.”
- Chocolate coating looks dull or develops white streaks: this is chocolate bloom from untempered chocolate or biscuits that weren’t fully cooled before dipping. Make sure biscuits are at room temperature and work with chocolate that’s been gently melted, not overheated.
Future Trends in Digestive Biscuit Production (2026 and Beyond)
Two forces are reshaping how digestive biscuit recipe formulations look on both the home and commercial side: health-driven reformulation and smarter, more flexible automation.
Healthier Reformulations
Reformulation pressure isn’t going away. Regulatory and consumer pushes toward lower sugar and higher fiber content mean manufacturers are testing higher wholemeal ratios, alternative sweeteners, and added fiber sources like inulin or resistant starch. The challenge, as the PMC review on the health benefits of whole grains notes when discussing processed whole-grain products, is that increasing whole-grain content can change a product’s glycemic and textural profile in ways that aren’t always intuitive, so reformulation tends to be iterative rather than a single ingredient swap.
For home bakers, this trend shows up as more digestive biscuit recipe variations using spelt flour, ancient grains, or higher oat ratios. These are worth experimenting with if you’re trying to push the fiber content up without sacrificing the classic crumbly texture.
Automation and Smart Manufacturing
On the production side, 2026-era lines increasingly integrate real-time moisture and color sensing directly into the baking tunnel, allowing oven zone temperatures to adjust automatically rather than relying solely on operator monitoring. This matters for digestive biscuits specifically because their wholemeal content makes them more sensitive to oven variation than plain white-flour biscuits. The higher fiber and bran content browns faster and less predictably.
Smaller manufacturers and bakeries scaling up are increasingly choosing modular lines that can switch between hard-dough biscuits (digestives, crackers) and softer cookie doughs without a full retooling. Our guide on optimizing biscuit production line efficiency covers some of the practical considerations for that kind of flexible setup.
| Trend | What’s changing | Impact on digestive biscuit recipe formulations |
|---|---|---|
| Sugar reduction | -15% to -30% sugar with bulking alternatives | Requires reformulated browning and moisture balance |
| Fiber enrichment | Higher wholemeal ratio, added inulin/resistant starch | Changes texture; needs iterative testing |
| Smart ovens | Real-time moisture/color sensing in tunnel ovens | More consistent browning across batches |
| Modular lines | Hard-dough and soft-dough on the same line | Faster product changeovers for smaller producers |
Frequently Asked Questions
Why do British people call them digestive biscuits?
The name comes from 1830s Scottish doctors who added baking soda, then believed to aid digestion. It’s a historical name with no real medical basis today. The biscuit just kept it.
What’s the difference between a digestive biscuit recipe and a graham cracker recipe?
Both use whole-grain flour and mild sweetness, but digestives typically include rolled oats and a higher butter content, giving a sandier, more crumbly texture than the snappier graham cracker.
Can I make a digestive biscuit recipe with oil instead of butter?
Yes, but expect a softer, less crumbly texture. Butter’s solid-at-room-temperature structure is what creates the characteristic short, sandy bite. Oil-based versions work but taste closer to a soft cookie.
How long do homemade digestive biscuits stay fresh?
Two to three weeks in an airtight container at room temperature, assuming they were baked to full crispness. Underbaked biscuits go soft within a few days.
Can I freeze digestive biscuit dough?
Yes, wrap the dough log tightly and freeze for up to three months. Slice and bake from frozen, adding 1-2 extra minutes to the bake time.
What’s the best digestive biscuit recipe for a cheesecake base?
Plain wholemeal digestives work best because their robust, slightly nutty flavor holds up against cream cheese fillings. Crush finely, mix with melted butter at roughly a 2:1 ratio, and press firmly before chilling.
Are gluten-free digestive biscuits as crumbly as the original?
Close, but not identical. Oat and rice flour blends with a binder like xanthan gum get reasonably close, though they tend to be slightly more delicate and break more easily when handled.
Why did my digestive biscuits turn out hard instead of crumbly?
Overbaking or overworking the dough are the two most common causes. Overworked dough develops too much gluten, and overbaked biscuits lose moisture past the point of being crisp-but-tender.
Conclusion
A good digestive biscuit recipe comes down to a handful of variables you can actually control: the wholemeal-to-white flour ratio, keeping the butter cold through mixing and resting, grinding the oats finely enough, and watching the bake closely since wholemeal flour browns faster than you’d expect. Get those right and you’ll land somewhere close to the tea-time classic: sandy, mildly sweet, and sturdy enough to dunk without falling apart.
If this look at how digestives go from dough to finished biscuit has you curious about the manufacturing side, whether you’re scaling a bakery or just like knowing how your favorite snacks are made, we’ve put together detailed breakdowns of the equipment and processes involved in commercial biscuit production. Start with our complete guide to biscuit production lines for a practical next step.
Related Articles
Modern Biscuit Production Line: How Factories Make Millions of Cookies Daily
Honey Biscuit Production Line: Complete Guide to Industrial Manufacturing
Top Hard Dough Biscuit Production Line for Efficient Baking Solutions
Biscuit Production Line Price Guide: Complete UK Manufacturer’s Investment Overview
Top Tips for Optimizing Your Biscuit Production Line Efficiency